Git Basics: A Simple Guide for Beginners
Aspiring Full Stack MERN Developer & DSA Enthusiast | Passionate about coding, problem-solving, and scalable web applications | Turning ideas into reality | JavaScript, React, Node.js — learning by building real-world projects 🚀
Imagine you are a school student and your teacher gives a group homework. Student A writes the homework on their computer, save it as homework.docx and copies the file to a pendrive and gives it to Student B. Then student B opens the file, makes some changes and saves it again as homework_1.docx and gives the pendrive to Student C.
Now, Student C has no clear idea what changes were made, the old version may be lost forever. If Student B forgot to add something or made a mistake, the pendrive had to be sent back to Student B again.
This process create many problems likes, two students can’t work at the same time, if two students edited the same file, one student’s work could overwrite by other student’s, There was also a risk of losing the pendrive or the pendrive not working. Because of all these issues, collaboration was difficult and time-consuming.To solve these problems, Git was introduced.
Today, things are very different. If I had known about Git, collaboration would have been effortless. Everyone could work independently, changes would be tracked automatically, and going back to a previous version would take just a click.
What is Git ?
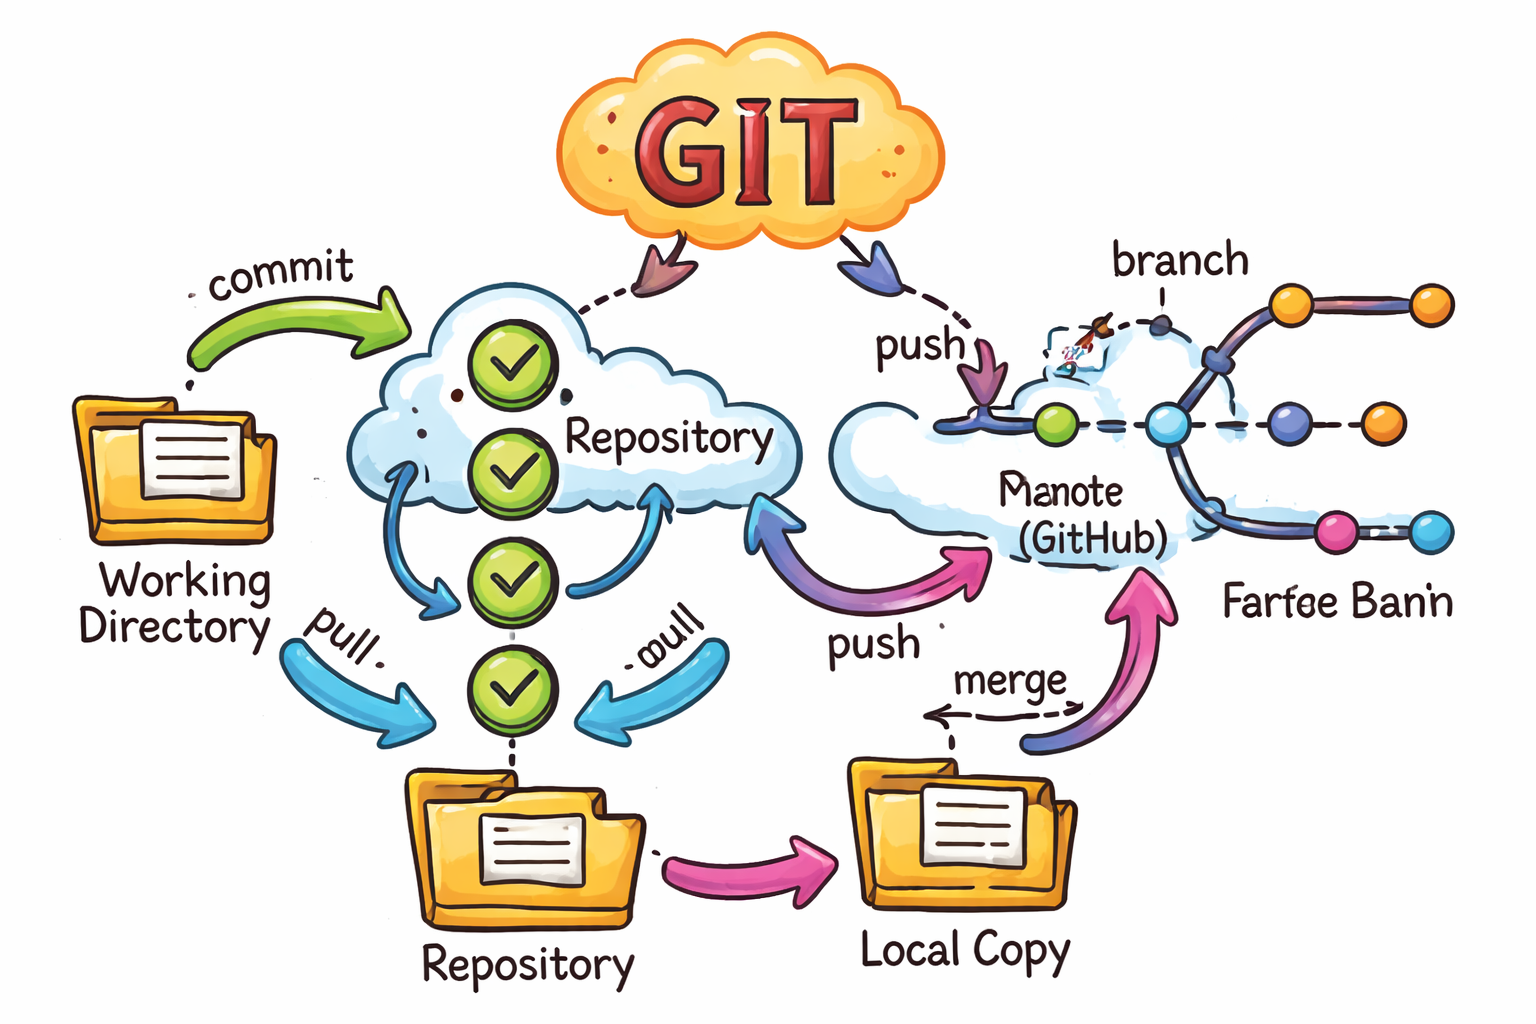
Git is an open-source, distributed version control system (VCS) designed to handle projects of all sizes with speed and efficiency. It allows developers to track changes in their source code locally and collaborate with others.
In simple words it is basically a software tool that is used to track and save automatically changes in code.
Why Git is Used ?
Git isn't just an odinary tool—it's a game-changer that solves real problems that we all face when creating any project. Here's some uses of Git:
Git is used to make working with code simple, safe, and organized. When developers write code, they often make changes, fix mistakes, or add new features. Git helps by keeping a complete history of these changes, so developers can easily see what was modified and return to an earlier version if something goes wrong. This reduces the fear of making mistakes and saves a lot of time.
Another important reason Git is used to team collaboration. In real projects, many people work on the same codebase. Git allows everyone to work on the project at the same time without overwriting each other’s work. Each developer can make changes independently and later combine them smoothly. This makes teamwork faster and more efficient.
Git is also useful for safe experiment. Developers can try new ideas, test features, or fix bugs without affecting the main code. If the experiment fails, they can easily discard the changes. This encourages them to learn and innovate without risk.
Overall, Git is used because it helps developers track changes, protect their code, and collaborate easily, making it an essential tool for modern software development.
Git Core Terminologies :
Below are some key concepts that you should be familiar with:
(1) Repository (Repo) :
A repository is your project’s home. It is a folder where Git keeps track of all your files and all the changes you make. When you initialize a repository, you are telling Git: “Track this folder and remember every change I make here”. It stores :
Project files
Complete history of changes
Branches and commits
In simple words, a repository is a folder that Git watches and saves the history of your work. It is the main container of a Git project.
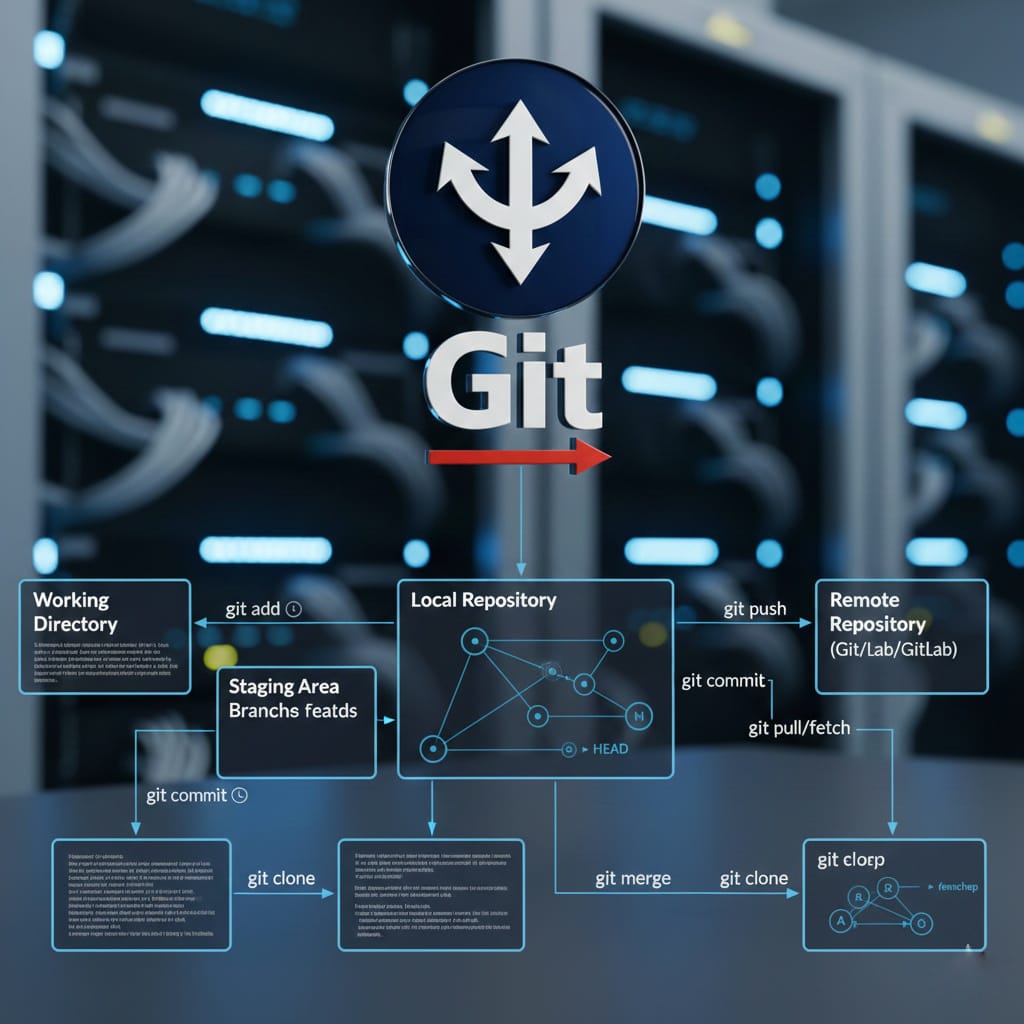
Types of Repository :
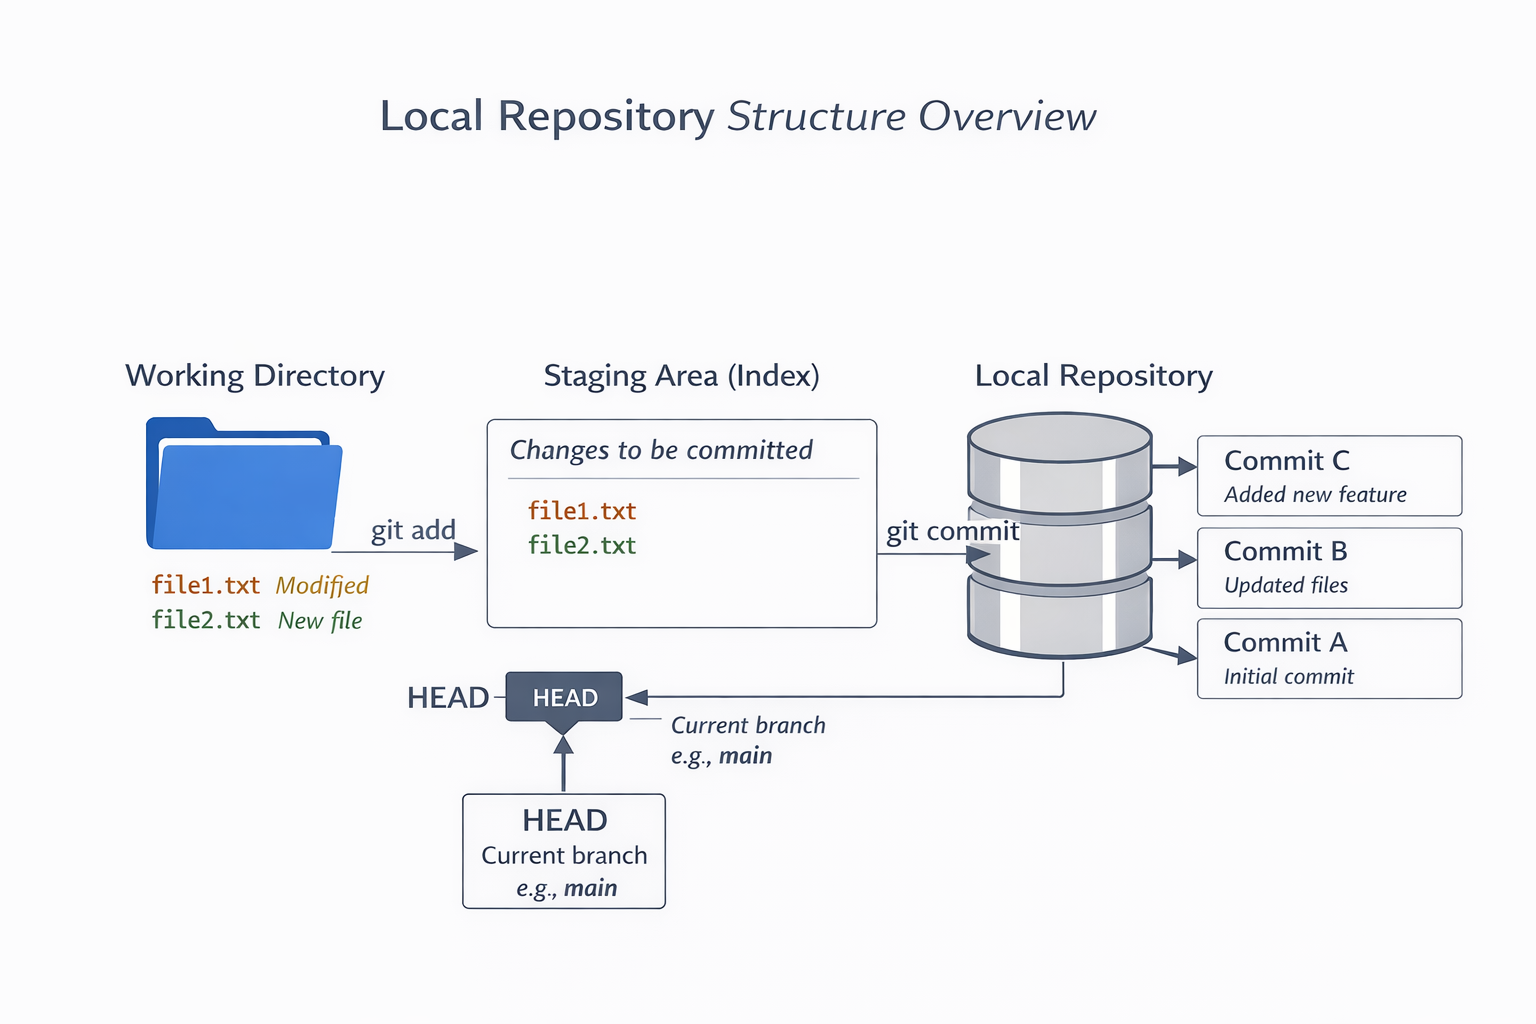
Diagram of Local Repositoy Structure :
(2) Working Directory :
Working directory means the current folder where your codebase is located. It includes all the files and folders you see and work on. It contains all the files tracked, modified, untracked, and ignored by Git. Changes made in here are not tracked by git until added to staging.
In simple words, Working Directory means Where you edit files.
Real Example of Working Directory :
Step 1 : You open a file (report.docx) and write the introduction
Step 2 : You add charts to data.xlsx
Step 3 : You delete an old reference file
Everything happens HERE first. Git watches but doesn't save anything yet.
(3) Staging Area (Index) :
Staging Area means a preparation zone before saving. You don't commit directly, first you add changes to the staging area, then you commit. This lets you choose exactly what gets saved, like selecting specific photos for an album instead of uploading your entire camera roll. The staging area gives you control and clarity. The staging area is a temporary area where : Selected changes are prepared before commit.
In simple words A staging area is a place to prepare changes before saving. It means files ready to commit
Real-life example of a Staging Area :
Imagine you are writing an assignment on your computer:
You edit many pages and make lots of changes. (Working Directory)
Before final submission, you select only the correct and final pages. (Staging Area)_
Then you submit those selected pages.(Commit)
(4) commit :
Commit means a saved snapshot of your work. Each commit is like taking a photo of your entire project at that moment. It permanently saves what your files look like right now, with a message describing what you did. Commits are the building blocks of your project's history. Basically it save snapshot of changes and creats the project history.
Each Commit Contain:
Real-life example of a Commit
Imagine you are writing a college assignment:
You complete one full section.
You save it with a note like “Finished Introduction”.
That save with a message is like a commit in Git.
(5) Branch :
A branch is an independent timeline for your work. It lets you develop features, fix bugs, or experiment without affecting the stable version of your project. When you create a new branch, you're saying: "Let me try something different without affecting the main story." It's like having multiple drafts of a document. After finishing, you can combine (merge) it back into the main branch. When you create a new Git repository, Git automatically creates one main branch.
This branch is called main (new standard) or master (older name).
In simple words A branch in Git means creating a separate path to work on or a parallel timeline for your work.
real-life example of a Branch:
You copy a file to try something new without changing the original.
That copy is like a branch in Git.
(6) Head :
Head means a pointer to where you are right now in your repository's history. Usually it points to the latest commit on your current branch. When you move around (checkout different commits or branches), HEAD moves with you. HEAD can be moved to any branch or commit according to your’s choose.
In simple words basically head shows your current position in Git history.
Real-life example of HEAD in Git
Imagine you are reading a book:
- You place a bookmark on the page you are currently reading.
That bookmark is like HEAD in Git. It shows where you are right now in the project history.
How Git works ?
Git works by tracking changes in files and saving them as versions, so you always know what changed and can go back if needed.
When you work on a project, Git first keeps track of your files locally on your computer. You make changes to your code just like normal—adding, editing, or deleting files. When you code is fully complete, you tell Git to save a snapshot of the current state of your project. This snapshot is called a commit. Each commit stores what was changed and when it was changed.
In simple words, Git works by recording changes, saving them as versions, and syncing them between people, making collaboration safe and easy.
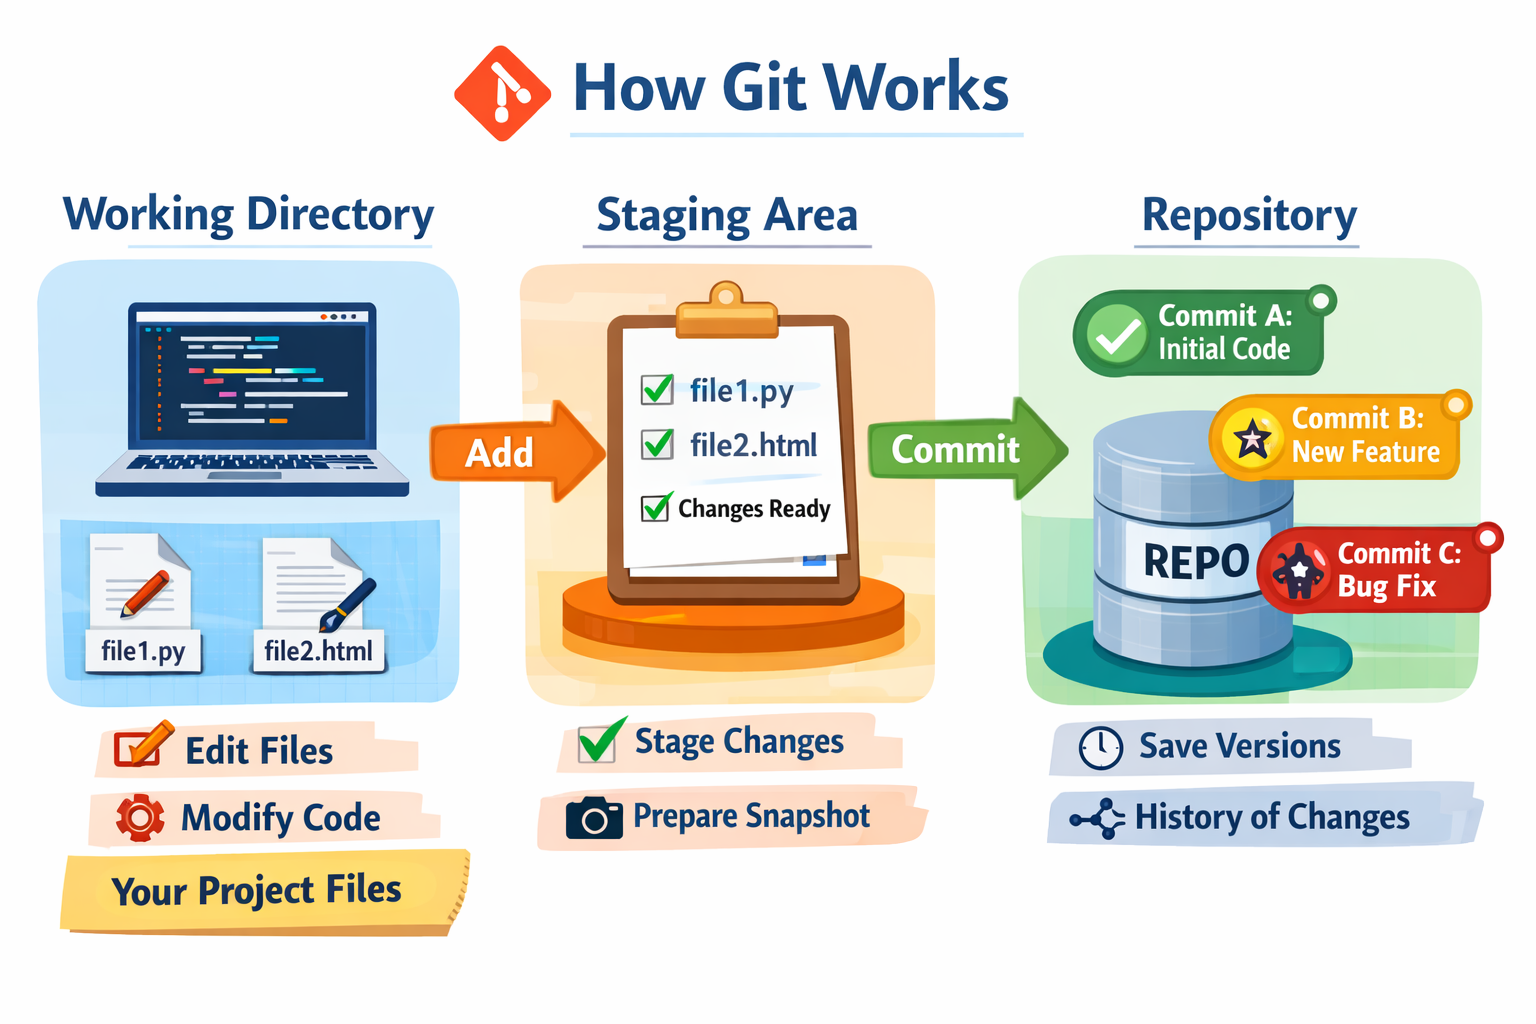
The Three-Stage Thinking Process :
Working Directory - Your actual files, where you make changes.
Staging Area - A preparation zone where you select what to save.
Repository - The permanent storage where snapshots are kept.
To understand, how Git works, here’s a simple diagram of Git Working :
Essential Git Commands :
Below is a simple, step-by-step demonstration of essential Git commands, written in easy language and perfect for beginners
Initialize a Git Repository :
git initThis command is used to start Git in a project. You run this once when starting a new project.
git initWhat it does:
Creates a hidden
.gitfolderTells Git: Start tracking this project
Add Files to the Staging Area :
git addThis command allows git to understand which files are to track and add them into the staging area
To add a specific file:
git add filenameTo add all files:
git add .This command moves files from:
Working Directory → Staging AreaCommit Changes :
git commitThis command captures a snapshot of the project's currently staged changes and saves it to the local repository's history. Each commit is like a checkpoint you can return to later.
git commit -m "initial message"What it does:
Saves a snapshot of your project
Adds a message describing the change
Check File Status :
git statusThis command shows the current status of your project.
git statusIt shows us:
Which files are modified
Which files are staged
Which files are not tracked
View Commit History :
git logThis command shows the entire history of the commits done inside a GIT repository. This helps you track what changed over time.
git logIt displays:
Commit ID
Author
Date
Commit message
Create a New Branch :
git branchThis command is used to create a new branch in your Git project.
git branch <new-branch-name>What it does:
Creates a new branch with the given name
Does not switch to the new branch automatically
Keeps your current branch unchanged
Change Branches :
git switchThis command is used to switch from one branch to another.
git switch branch-nameIt allows us to:
Move between branches easily
Work on different features separately
Combine Branches :
git mergeThis command is used to merge one branch into another.
git merge branch-namewhat it does:
Combines feature branch changes into the main branch
Helps finalize completed work
See What Changed :
git diffThis command shows the difference between file versions.
git diffIt helps you:
See what code was added or removed
Review changes before committing
Undo a Commit Safely :
git revertThis command is used to reverse a specific commit.
git revert commit-idwhat it does:
Creates a new commit that cancels the changes
Keeps project history safe
Upload Changes :
git PushThis command sends your commits to a remote repository like GitHub.
git pushwhat it does:
Shares your code with others
Updates the remote project
Download Updates :
git pull
This command gets the latest changes from the remote repository.
git pull
what it does:
Updates your local project
Keeps your code in sync with the team.
Quick Summary of Git Commands :
git init      → start Git
git add       → stage files
git commit    → save changes
git status    → check changes
git log       → view history
git branch  → manage branches
git switch  → change branch
git merge   → combine work
git diff    → view changes
git revert  → undo safely
git push    → upload code
git pull    → download updates
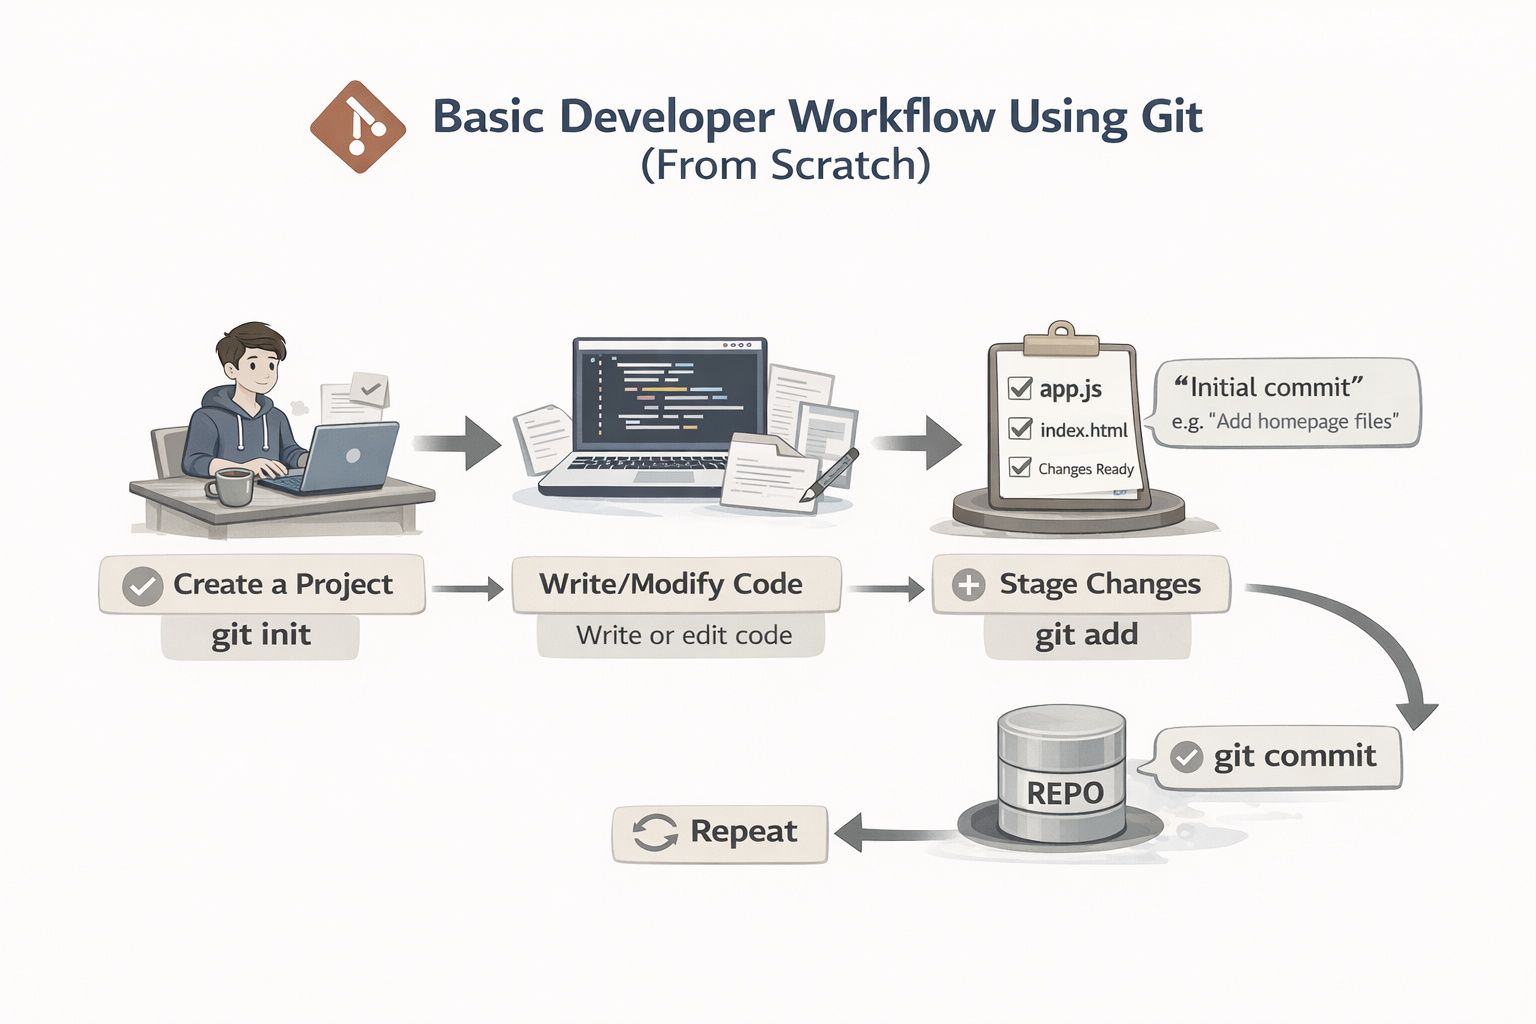
Basic developer workflow using Git from scratch :
Step 1: Create a Project Folder
Create a new folder and move into it.
Step 2: Initialize Git
Start Git tracking in the project.
Step 3: Create or Modify Files
Create files and write code.
Step 4: Check Project Status
See what files are changed or untracked
Step 5: Add Files to Staging Area
Select changes you want to save.
Step 6: Commit Changes
Save a snapshot of your work.
Step 7: Continue Working (Repeat)
Make more changes and repeat the same cycle:
Here’s is simple diagram of a basic developer workflow using Git from scratch :
Commit History Flow in Git :
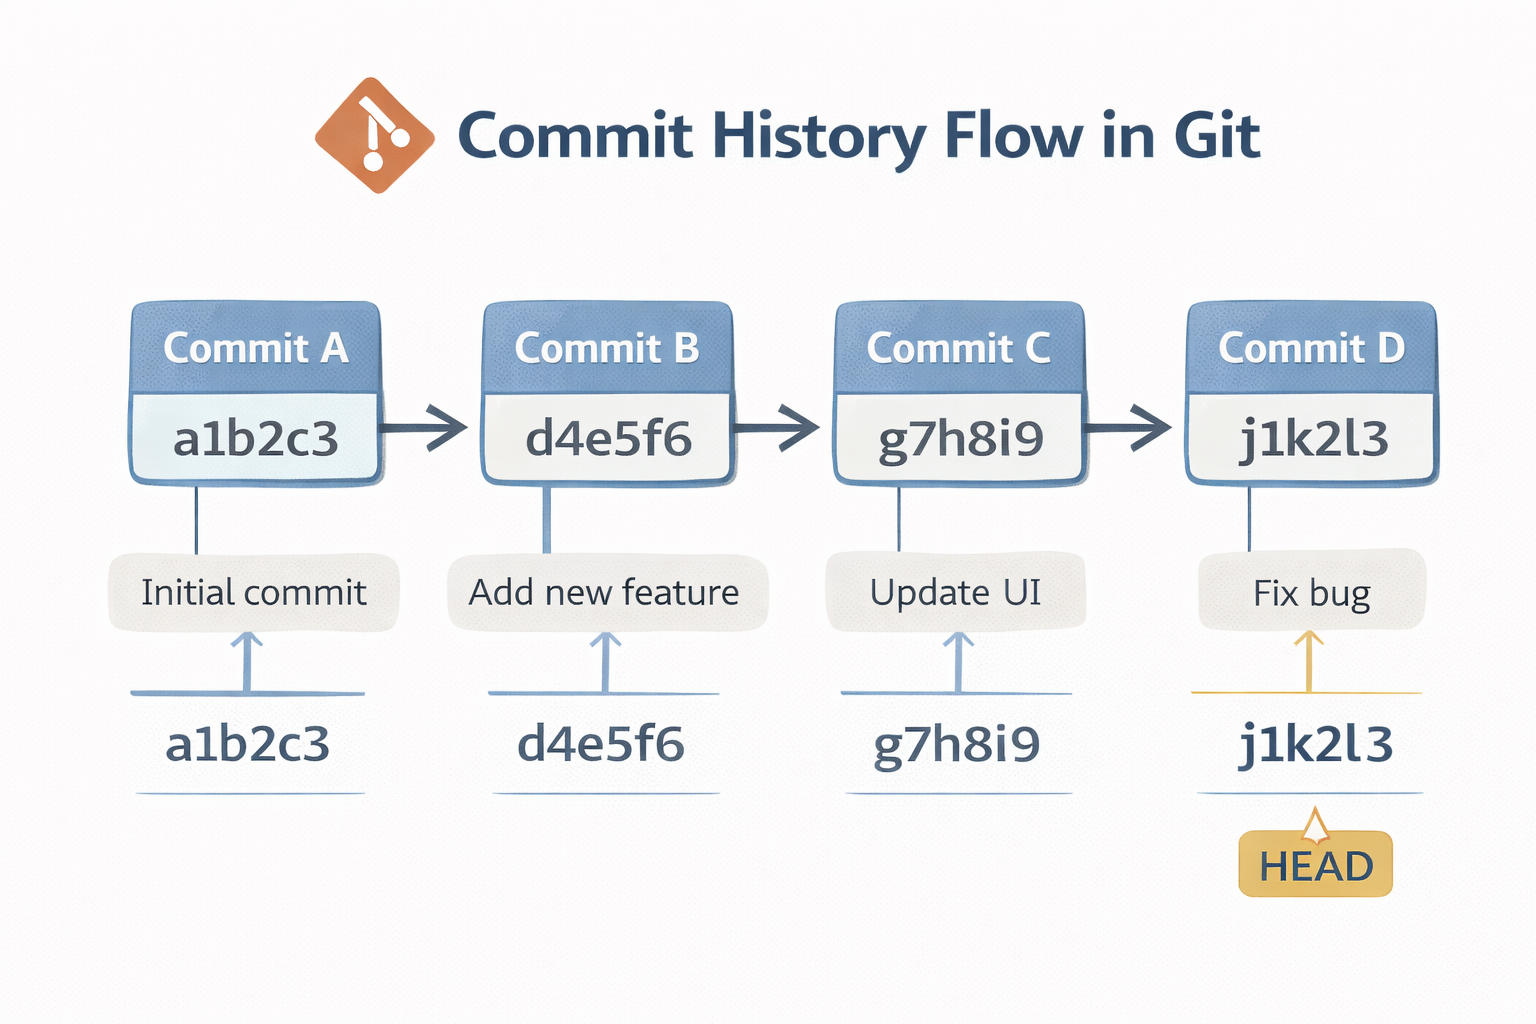
Commit history is the timeline of changes in a project. Every time you commit, Git saves a snapshot of your work and adds it to the history. The first commit becomes the starting point, and each new commit is linked to the previous one.
This creates a chain of commits that lets you track changes, view older versions, and restore previous states, making debugging and progress tracking easier.
Here’s is simple diagram of Commit History Flow in Git :
Conclusion :
Git may seem confusing at first, especially with all the new commands and terminologies, but once you understand how it works behind the scenes, it becomes an extremely powerful tool. It helps you track your progress, experiment without fear, and collaborate smoothly with other developers.


